
https://pagead2.googlesyndication.com/pagead/js/adsbygoogle.js
(adsbygoogle = window.adsbygoogle || []).push({});
While most of us have been stuck at home for almost a year now, many of us decided to take on DIY projects to embellish our homes, make them more practical and improve their entertainment and office space offering. People are looking fo more space in their homes as we end up spending more time in our houses, and moving away from downtown cores to find more sensible prices.
Home Trends
The online interior design platform Modsy released its 2021 trend report, which is chock-full of:
- COVID-inspired interior design trends
- emerging style predictions
- product sales comparison insights
- survey data from thousands of people across the U.S.
Some of the insights include:
- With all the time being spent at home, people are using their homes to show off their personalities. Eclectic style has risen in popularity by 13%.
- The percentage of Modsy customers designing a nursery in June 2020 was 40% higher than the 2020 average.
- Sales in the baby/kids product category grew 60% from June 2019 to June 2020. Does that mean the COVID-19 baby boom is real?
- Home offices were obviously on the rise, with home office furniture sales tripling in April 2020 vs April 2019.
- Consumers (25%) reported lighting as being the most important component of the home office, followed by quietness/soundproofing (20%) and ergonomic furniture (18%).
- Mid-Century remains popular, as the style’s clean lines and flexibility make it ideal for small spaces.
- Traditional style rose 6% in popularity, while classic style grew 11%, despite these styles being consistently the least popular among Modsy customers in the past.
- Storage furniture and accent chairs were among the most popular products Modsy customers purchased in 2020.
- Main seating purchases rose in May 2020, with customers spending an average of 4% more on main seating furniture that month.
- 69% of people engaged in a home redesign project in 2020, with many customers opting to reorganize, move, or change the aesthetic of their spaces.
(adsbygoogle = window.adsbygoogle || []).push({});
Home Predictions
This year, Modsy expects the desire for nostalgia to increase, with Grandmillennial style taking hold. The site also expects bold wall colours, which perhaps remind people of hotels and restaurants, to make way into homes.
Home DIY Projects & Renovations
As stated above, staying home for most of the spring months made many Americans start their own home renovation projects rather than hiring outside contractors. Since the beginning of the COVID-19 pandemic, TOP Data has found as much as a 41% increase in traffic at home improvement stores like Home Depot and Lowes compared to the same months in 2019.


Marble DIY Projects
For me, that meant more time to engage in DIY projects that have been sitting on the back burner for far too long.
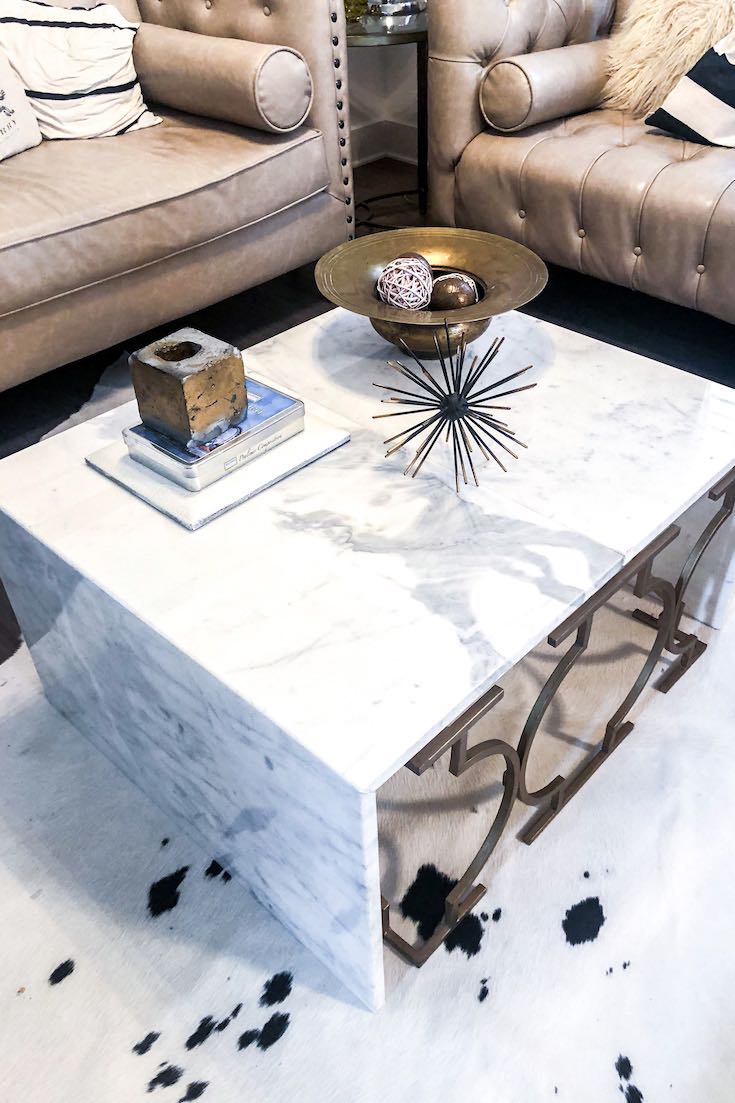
Waterfall Marble Table
For one, I had 2 Carrara marble corner slabs that sat in my house for 4 years idle, basically moving from one corner of the living room to another while mulling over what should be done with them.
I had longed for a marble table, but with prices over the roof, it wasn’t an option. Until a light bulb lit one day. My marble slabs! I just had to figure out how to fuse them to make them into one and how to get them to stand. My existing table had a nice brushed gold metal base that by eyeballing it, seemed to be the same height as my slabs. So I figured out how to make them stand. Now, how do I glue them together. In come my engineer husband. He suggested to cement them together and secure them with wood boards at the bottom.
![]()
View this post on Instagram
Material
Off we went with setting up our space. This is what you need:
- Marble slabs
- Table Base
- Cement
- 1 wooden board (should be based on the difference between your table base and your marble if the marble is taller than your base, if they are the same height, you may opt to put furniture padding so that the marble sits on the floor and doesn’t hang on the base.
- Tarp to protect your floor
- Heavy items
Steps
- Measure the height of your slab so that you can determine the right thickness of your board
- Flip the slabs onto their back on a tarp
- Bring them as close as possible to each other and add the cement in the middle seam to fuse them
- Secure the seam with the wooden board by gluing the board over the seam with the cement
- Place heavy items on top of it over night
- The next day, check that it’s safely fused, if yes, move it over the base and you’re done!
The hard part was the lifting.
Marble Slab Table
The second marble slab was part of an existing table which I had changed the base for. Unfortunately, with children, they broke it and I had to sadly store it away for a few years. To fix this one, we had to get creative. Unfortunately I don’t have any photos of it yet as it is in storage currently.
Material
- Cement
- Plywood board 1/2″
- Tarp to protect your floor
- Heavy items
Steps
- Cut your board to the exact measurements of your table
- Place the board on top of the tarp
- Add the broken slab over the board
- Glue the crack with the cement
- Place heavy items over night
- Remove and place over your base
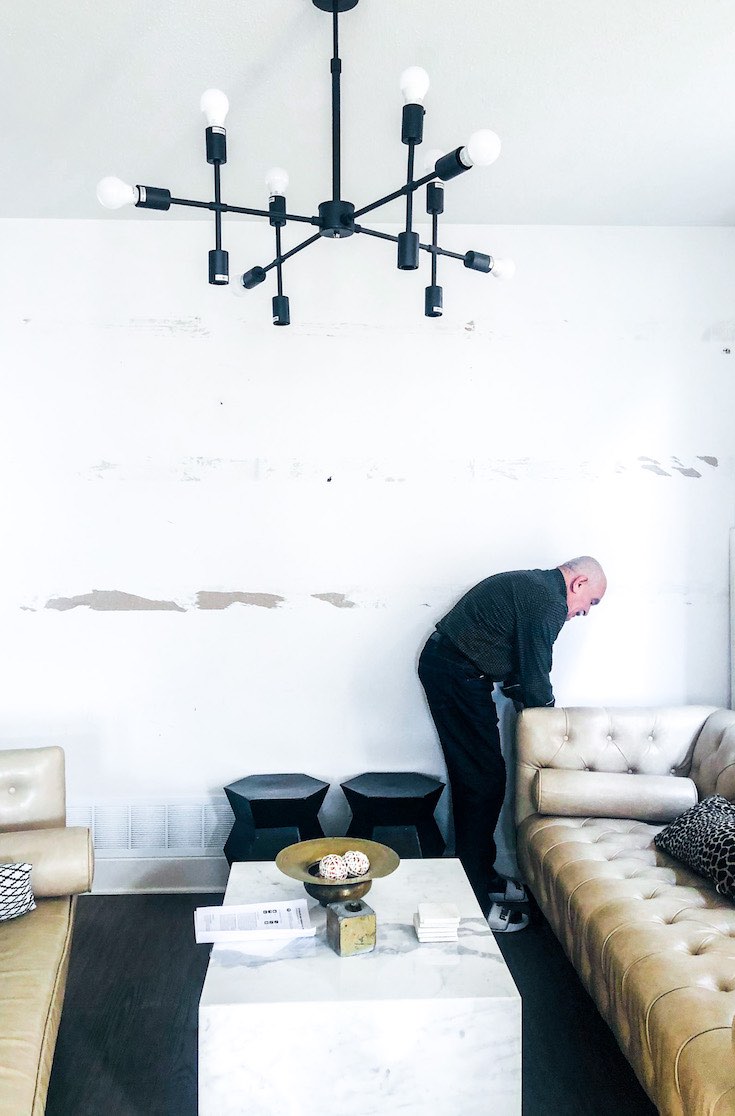
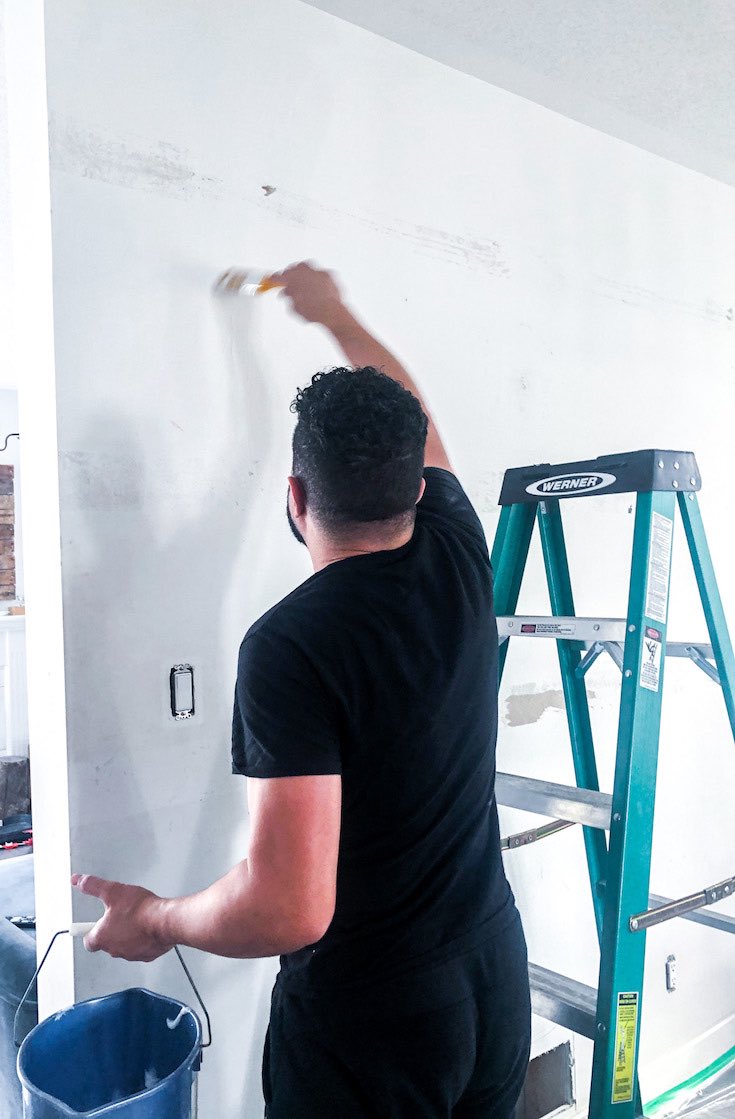
Marble Wall
For the longest time, I’ve had a feature wall that was ok but lacked some pizzaz. My love of marble drew me to want to make it look like a marble wall. As you know, slabs, especially in 9 ft x 11 ft are extremely expensive. I had to find a workaround. Let me tell you it was quite the difficult task to find something of quality. My wall looked horrible and it was the first thing you see when you come in. Luckily we didn’t have guests given the pandemic so it bought us time to experiment.
Cheap Wallpaper
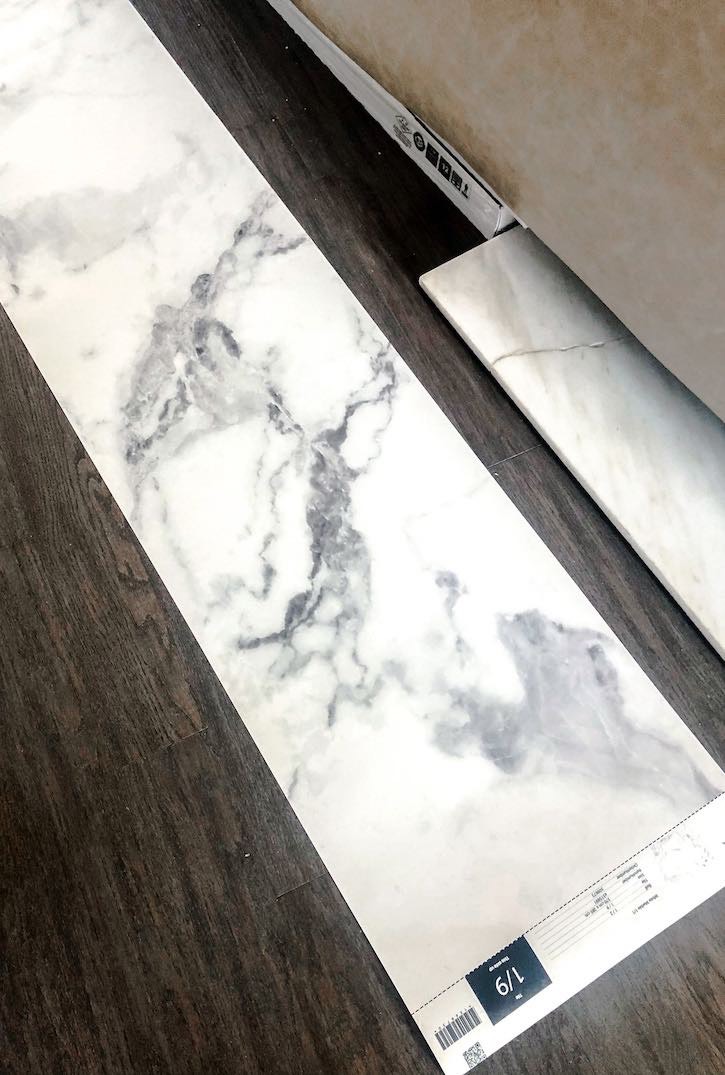
My first purchase was a great looking wallpaper (on photo at least) that was decently priced. Reviews seemed fine so I took the bait. It took 3 months for it to arrive. When it did, it was wrinkled, pixelated and the material was similar to one you’d use for a picnic tablecloth. Boy was I horrified.
Not only that, it was a foot too short! That last bit was my fault but I was determined to use it (ever heard of the sunk cost effect, here it is at its best). So instead of using it on the living room wall, I added to a kitchen column I had. It looks very cheap, especially as time passes. That was an epic fail.
Wall panels
Next, I found high end wall panels domestically sourced and hand made that were sensibly priced. I thought, great! Here’s my golden ticket. Well I toured the city to find a vendor as the factory does not sell to customers. When I finally did,I spent nearly 1.5 hours at Rona to place the order as it had to be a special order. For 6 weeks I waited as prescribed, but they never came. I followed and kept being promised that they would come week after week. Finally nearly double the time after, they cancelled my order and told me the factory is backlogged and our policy no longer allows us to order these in….way to go Rona!
High-end Wallpaper
I had no choice but to go back to the drawing board. For weeks, I looked for wallpaper that was well priced, of high quality and offered GOOD CUSTOMER SERVICE! I found a few but the angels were listening to me.

One day, I was contacted by Photowall from Sweden. They wanted to partner with me on creating a feature wall in my home. All I had to do is give my measurements, choose my design and bob’s your uncle. So I did, except that again, it took some time to process my order…luckily that all got sorted it out within a couple of weeks…but the end result made me forget about how beautiful the end product was.
Material
The beauty with this company is they send you all the material you need to do this. Just bring your Exacto knife:
- Wallpaper glue
- Ladder
- Bucket
- Stirring stick
- Water
- Clean cloth
- Exacto knife
- Paint brush
Steps
- Follow the directions to cut the boarders around each panel and ensure to place according to the numbering
- Mix the glue powder with the water and stir with the stick
- Generously add glue to the wall with a paint brush before placing the panel
- From the top, place the panel onto the wall and secure it to the bottom while wiping away the excess glue
- Repeat for each panel until done
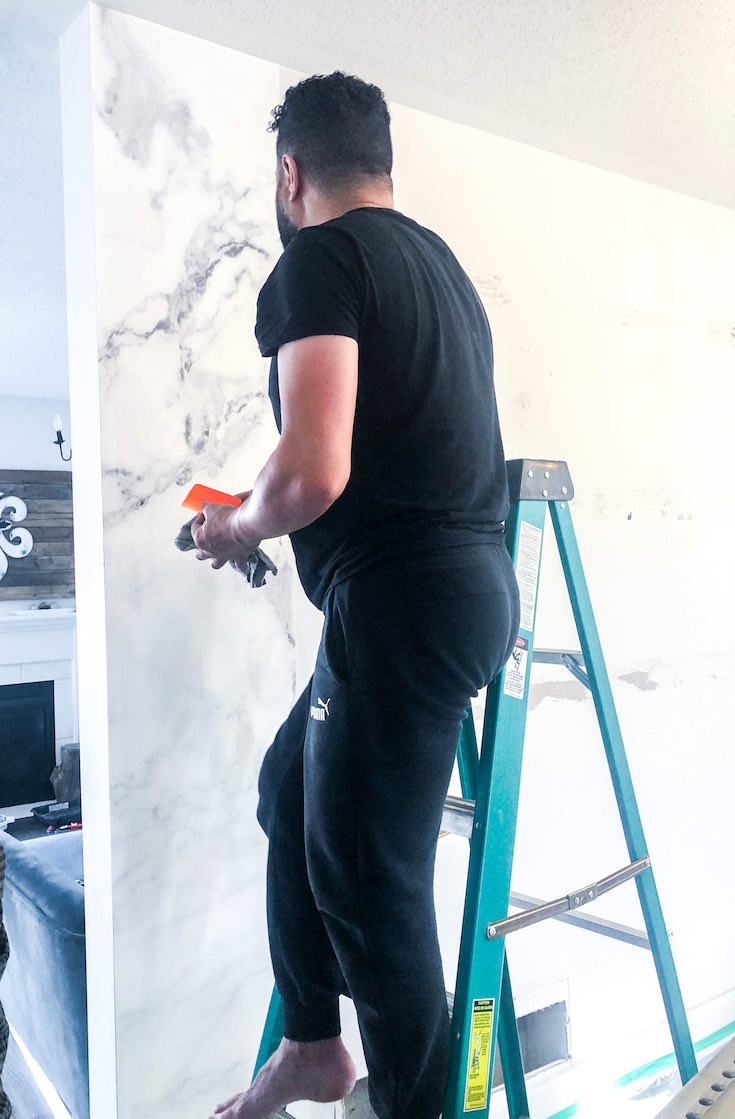
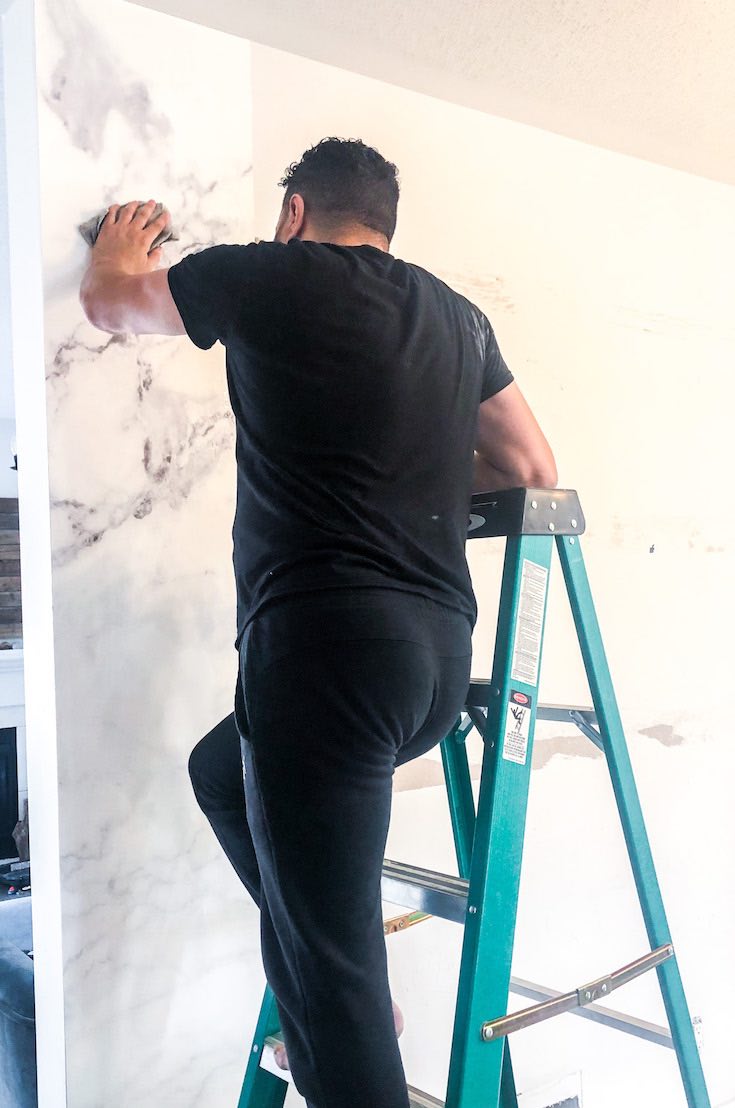
You will be amazed at how beautiful it is. People coming into my house thought it was ACTUAL marble! The price for the quality is well worth it and I would even urge that you select the upgrade to get the easy clean one.
The Gist of it
As many of us undertake DIY and renovation projects to make our homes work better for us, be sure to remain patient. Not only that, I would suggest to thoroughly think of the options you select as you will have to live with them for a long time. I was determine to use the crappy marble wall paper and now I am having to replace it, ignoring my husband’s advice of just simply trashing it or using it to protect the inside of the kitchen cabinets lol.
What DIY projects do you have on your list this year?
P.S. If you enjoyed this post, sign up to my newsletter to get the latest advice, tips, and giveaways right into your inbox!
(function(d, s, id) {
window.Wishpond = window.Wishpond || {};
Wishpond.merchantId = ‘867182’;
Wishpond.writeKey = ’59f0e9b51410′;
var js, wpjs = d.getElementsByTagName(s)[0];
if (d.getElementById(id)) return;
js = d.createElement(s); js.id = id;
js.src = “//cdn.wishpond.net/connect.js”;
wpjs.parentNode.insertBefore(js, wpjs);
}(document, ‘script’, ‘wishpond-connect’));

Leave a comment